
こんにちは。のり(@nori_ynt1103)です。
「NFTの損益計算ってどうやれば良いの?」
「かんたんに損益計算できるツールはない?」
こんな悩みを解決する記事を書きました。
仮想通貨やNFTの確定申告の方法で悩んでいる方は多いのではないでしょうか?
僕自身も昨年から購入し始めたので、今回が初めての確定申告になります。
当然不安なので、色々と調べましたが…
ヤバい、なにこれ。さっぱり分からん…((((;゚Д゚)))))))
最初はGoogleスプレッドシートで管理していましたが、途方もない量&手動だったので早々にギブアップ。
そんな状況で出会ったのが、クリプタクトの損益計算ツールでした。
本記事では、クリプタクトの有料プランを使ってNFT売買の損益計算をする方法を解説します。
この記事で分かること(ゴール)
・クリプタクトについて
・クリプタクトで損益計算する方法(画像付き)
なお、本記事はあくまで「クリプタクトで損益計算する方法を紹介する」記事です。
個別具体的な税金の相談はできませんので、ご了承ください。
僕も不安だったけど、これから紹介する方法でできたよ!
\ 損益計算で困らなくて済む /
クリプタプトについて

クリプタクトは、税理士や公認会計士も認める仮想通貨やNFTの損益計算ツールです。
NFTの取引履歴(カスタムデータ)をアップロードするだけで自動計算してくれるため、確定申告には欠かせません。
あくまで確定申告の手助けになるツールなので、手入力が必要な部分もあります。
ただ、計算自体はかんたんになりますよ。
「なるべく低コストで、楽して確定申告をしたい」方におすすめです。
お試しプラン(年間8,800円)以上なら、NFT取引データをアップロードできます!
>>料金プランの詳細についてはこちら
クリプタクトで損益計算する方法(画像付き)

次の4ステップでかんたんに始められます。
- アカウント登録
- プランの変更
- 各取引所のデータをアップロード
- NFTの取引履歴をアップロード
1つずつ解説していくね!
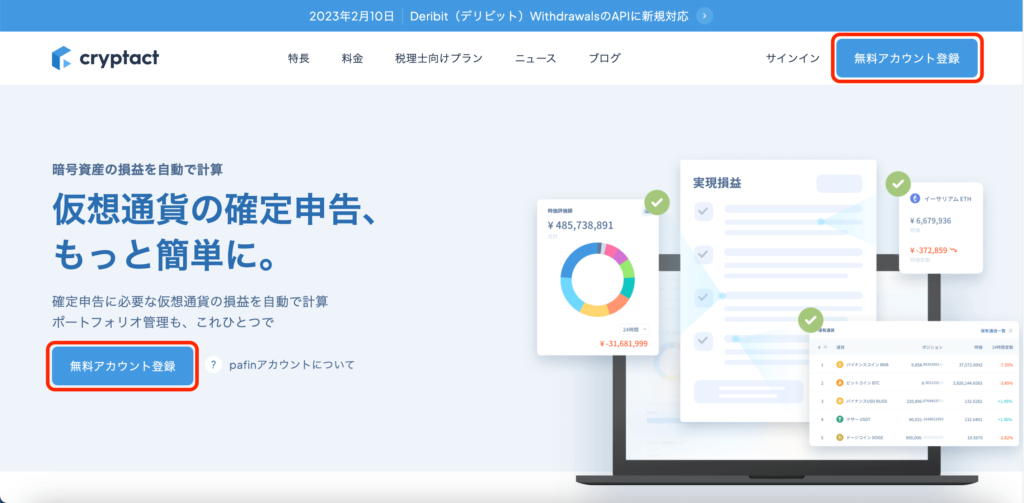
ステップ1:アカウント登録
「無料アカウント登録」をクリック👇(どちらでもOK)
メールアドレスを入力します。
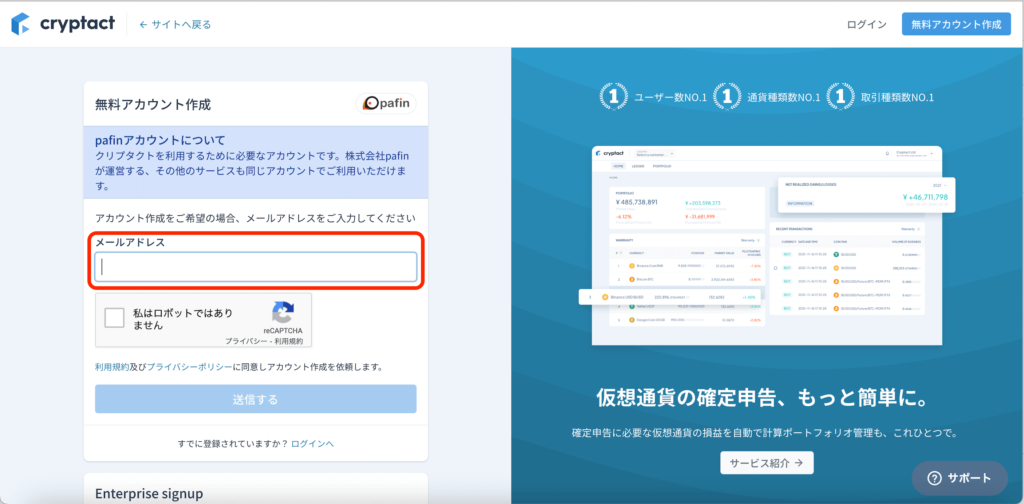
「私はロボットではありません」にチェックを入れます。
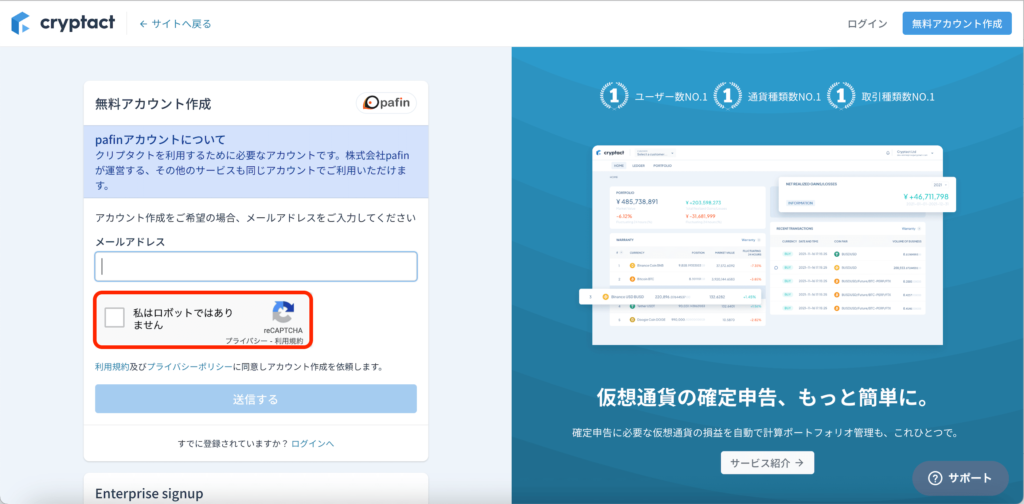
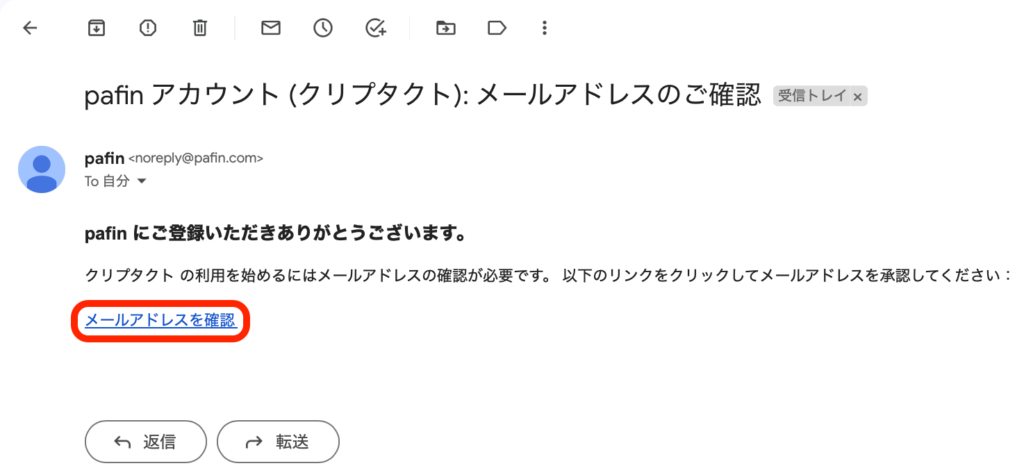
「送信する」をクリック後、登録したアドレスにメールが届きます。
メールを開き、「メールアドレスを確認」をクリック👇
パスワードを設定し、「アカウント登録」をクリック👇
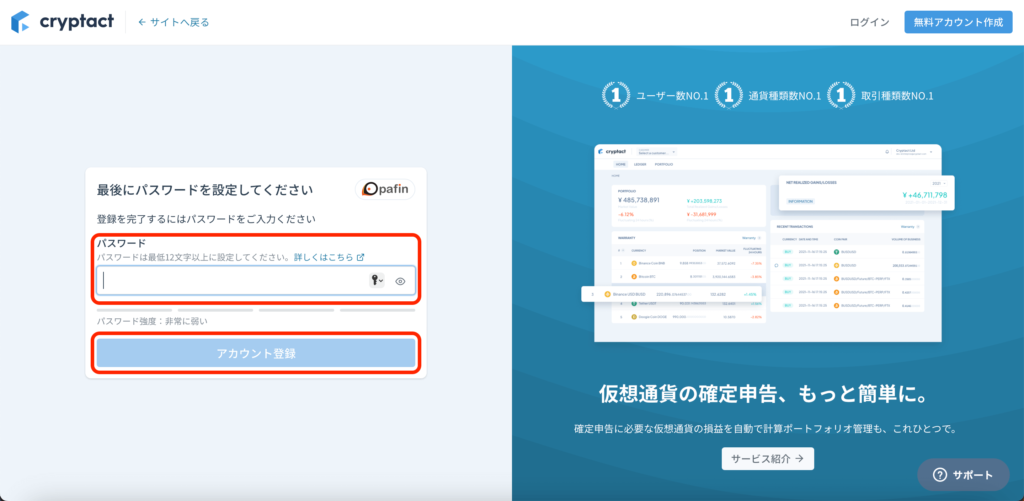
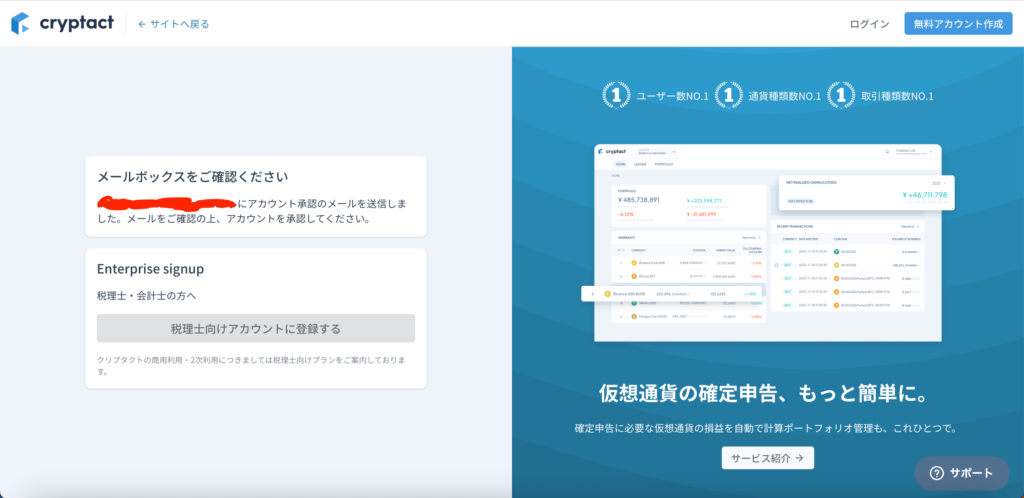
以下のメッセージが表示されたら、登録完了です。

1、2分あればできちゃうね!
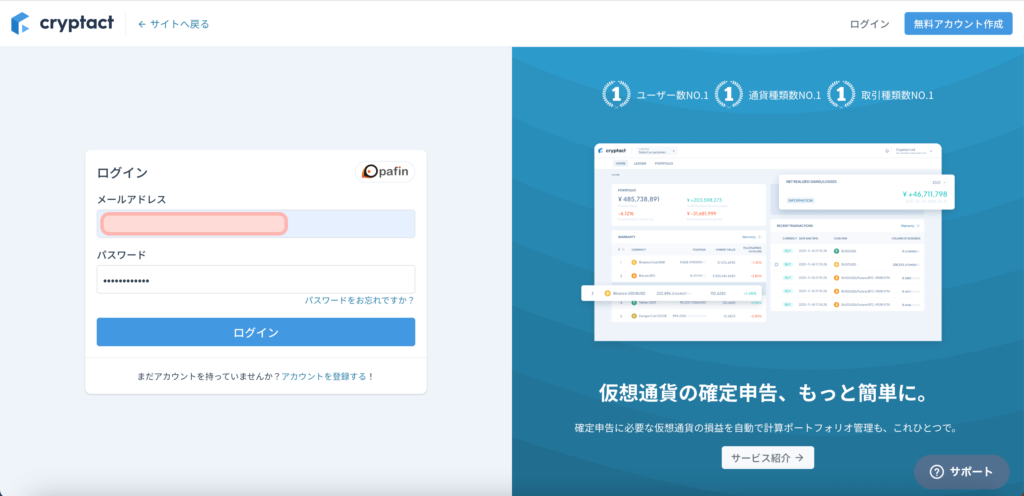
メールアドレスとパスワードを入力し、「ログイン」をクリック👇
そのまま「続ける」をクリック👇
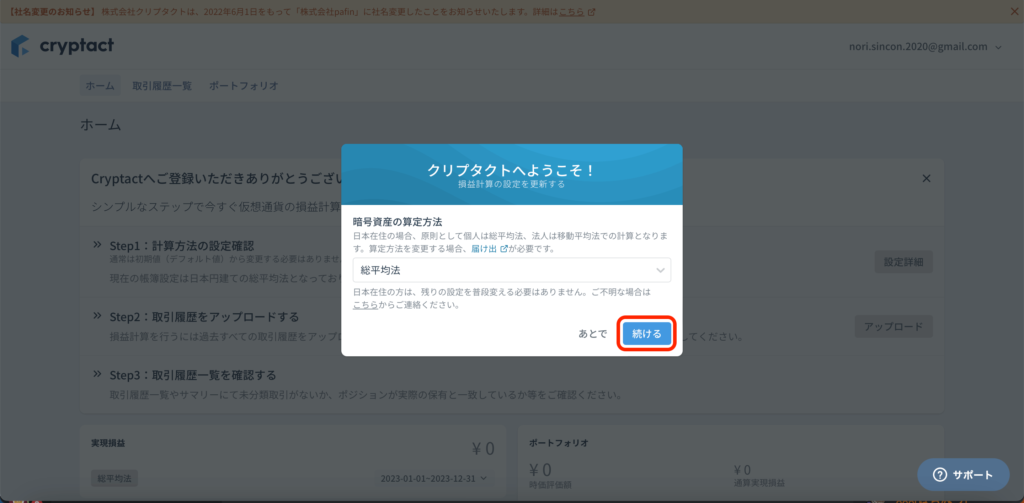
「あとで」をクリック👇
(「使い方をみる」でもOK)

ログインした状態で、トップ画面に戻ります。
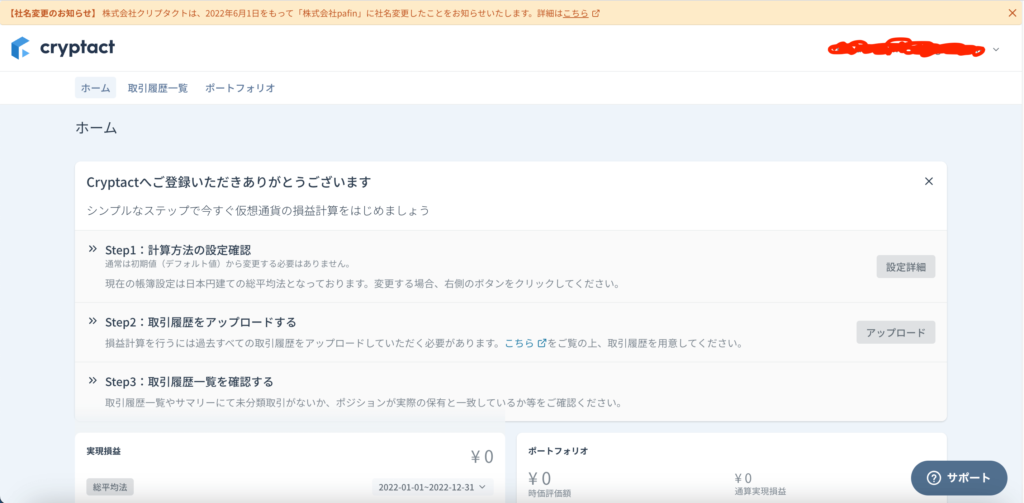
ログインできたよ!
ステップ2:有料プランへの変更
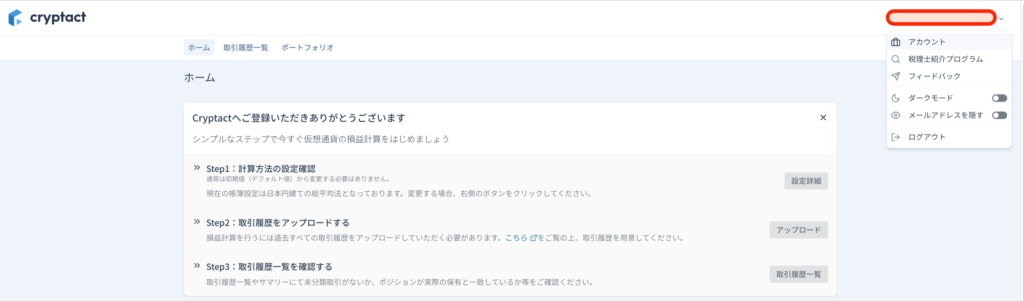
右上の「∨」 → 「アカウント」をクリック👇
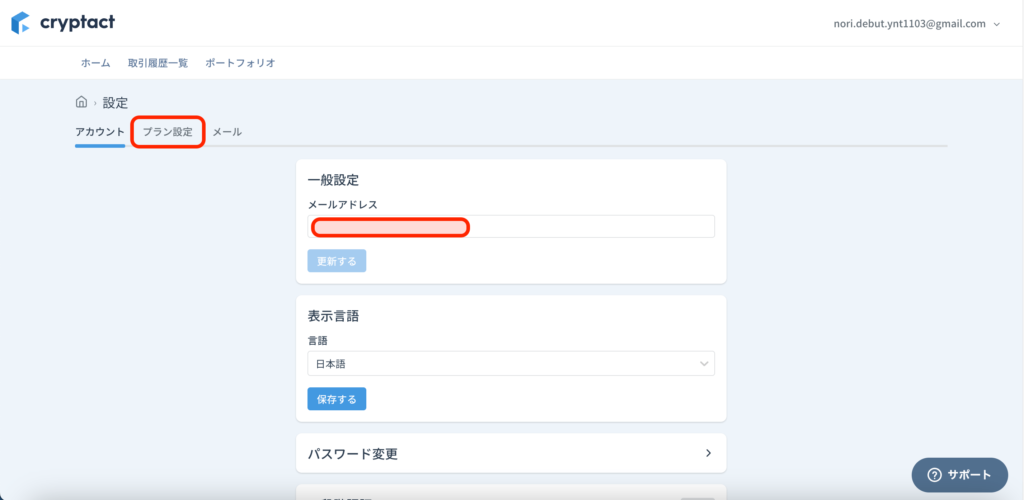
「プラン設定」に切り替え。
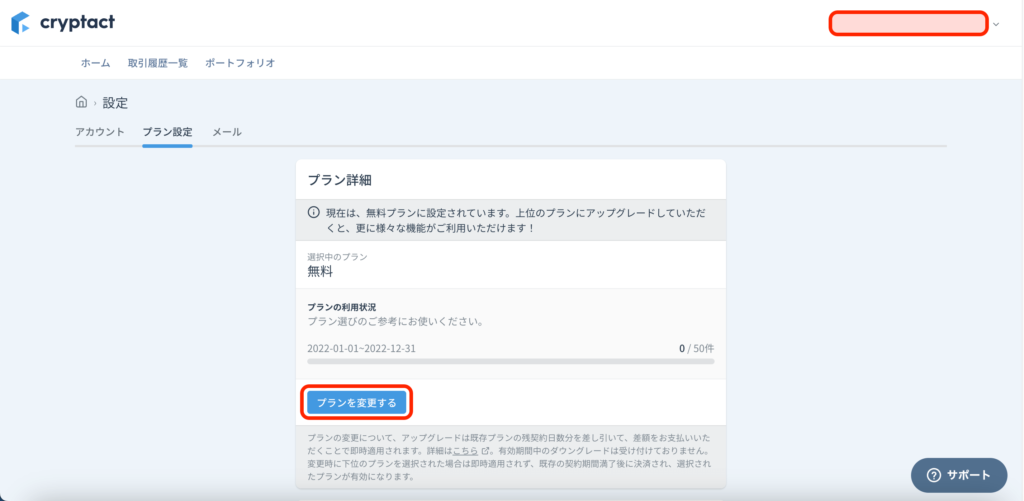
「プランを変更する」をクリック👇
自分に合うプランを選び、「選択する」をクリック👇
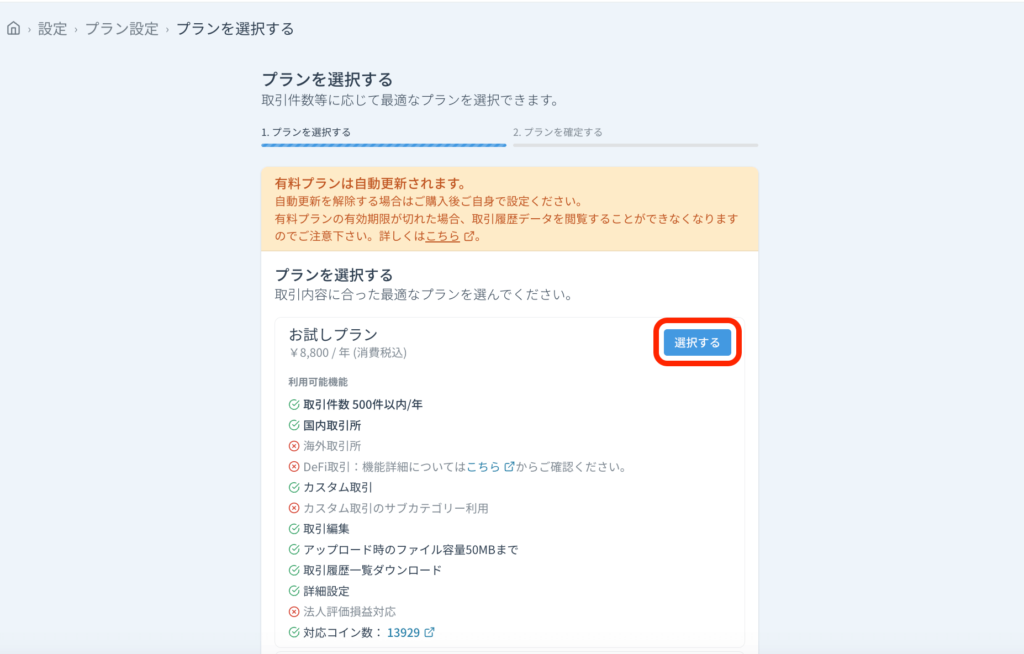
僕はお試しプラン(赤枠)を選んだよ!
>>料金プランの詳細についてはこちら
海外取引所の利用者は、「ライトプラン」以上で契約してください。
(海外取引所は未対応のため)
「クレジットカードで支払う」をクリック👇
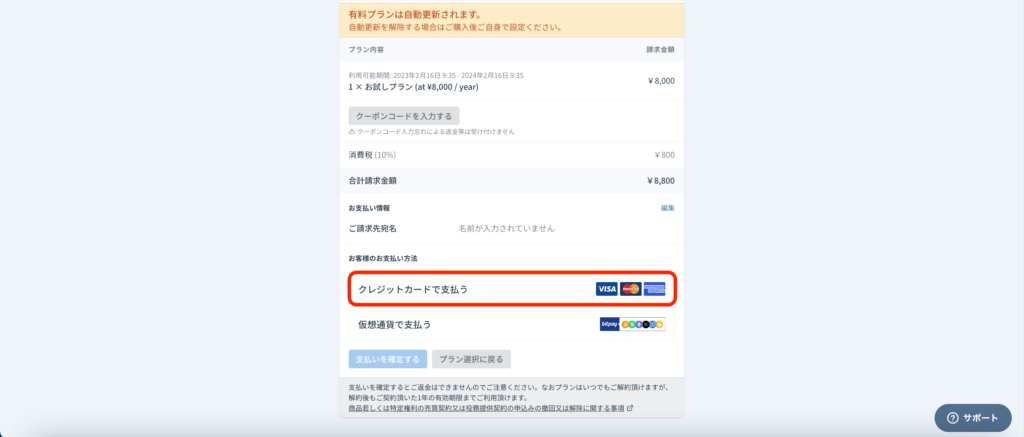
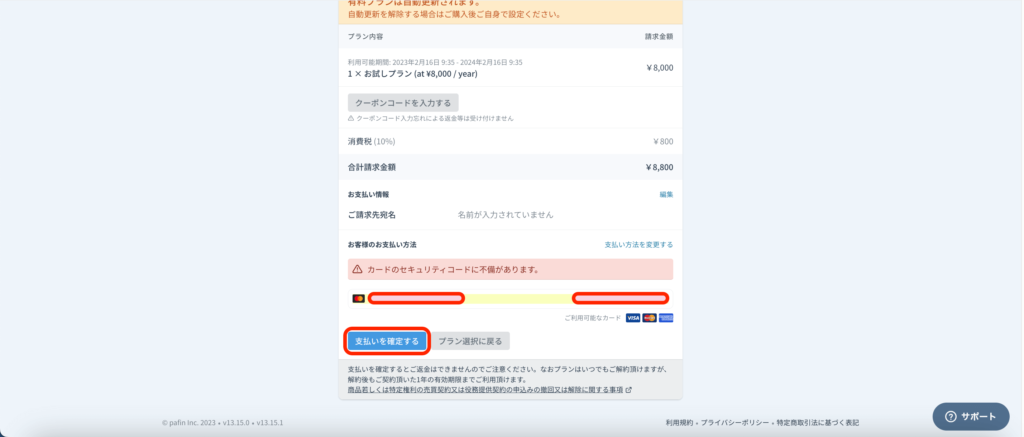
カード情報を入力し、「支払いを確定する」をクリック👇
以下のメッセージが表示されたら、変更完了です!

なお、以下の期間が過ぎると、同じプランで自動更新されます。
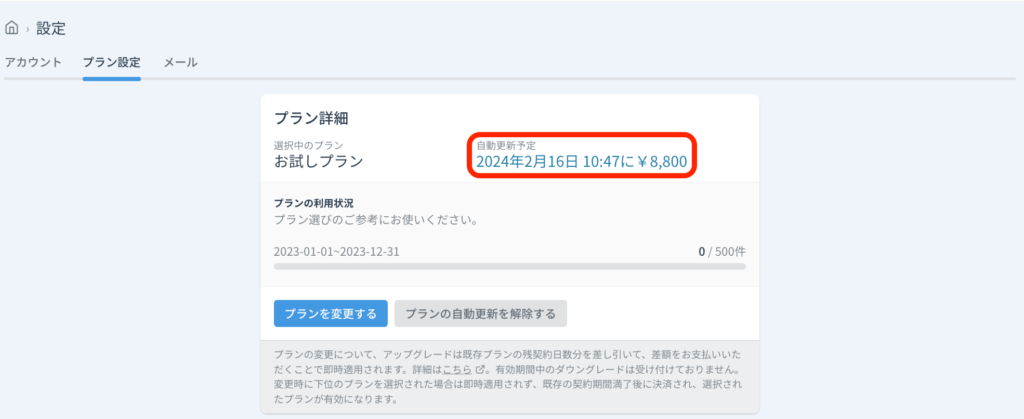
プラン変更を検討している方は、気をつけましょう!
ステップ3:各取引所のデータをアップロード
使ったことがある取引所からデータを取得、アップロードしていきます。
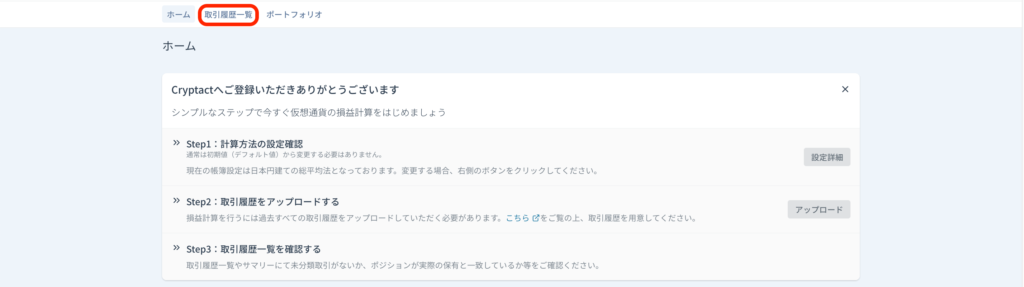
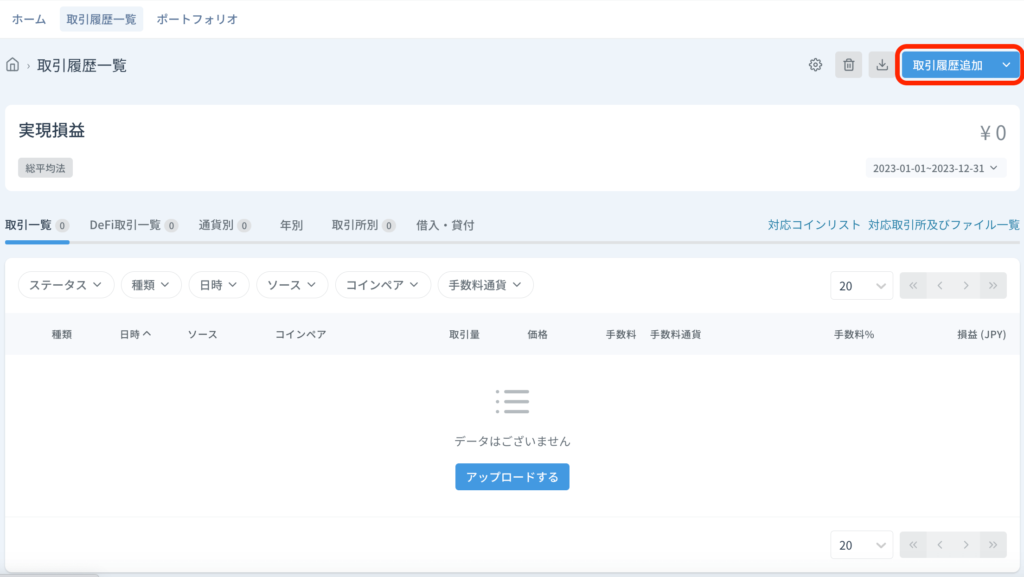
トップ画面に戻り、「取引履歴一覧」に切り替え。
画面右上の「取引履歴追加」をクリック👇
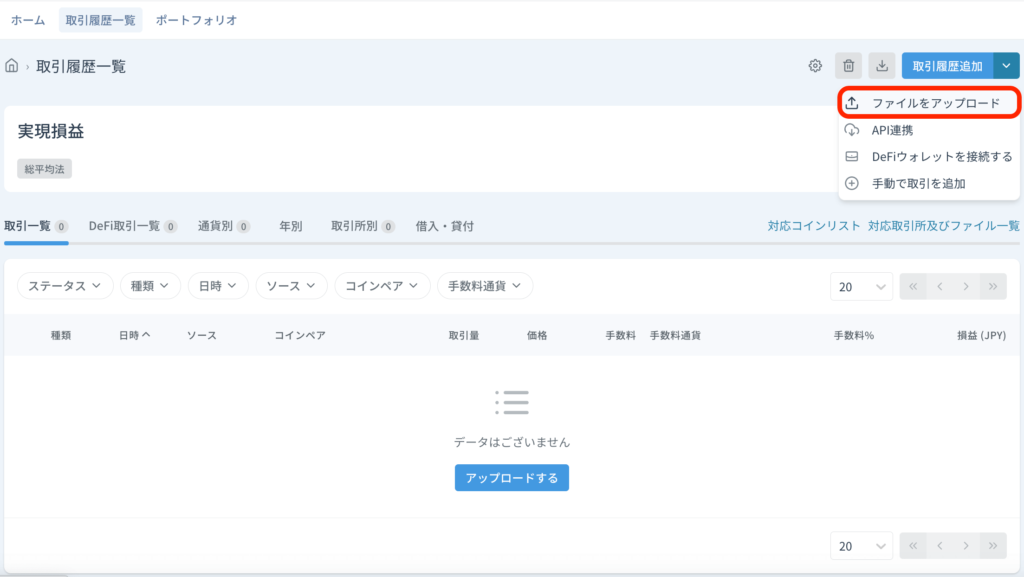
「ファイルをアップロード」をクリック👇
使ったことがある取引所からデータを取得し、アップロードします。

漏れがないように、気をつけましょう!
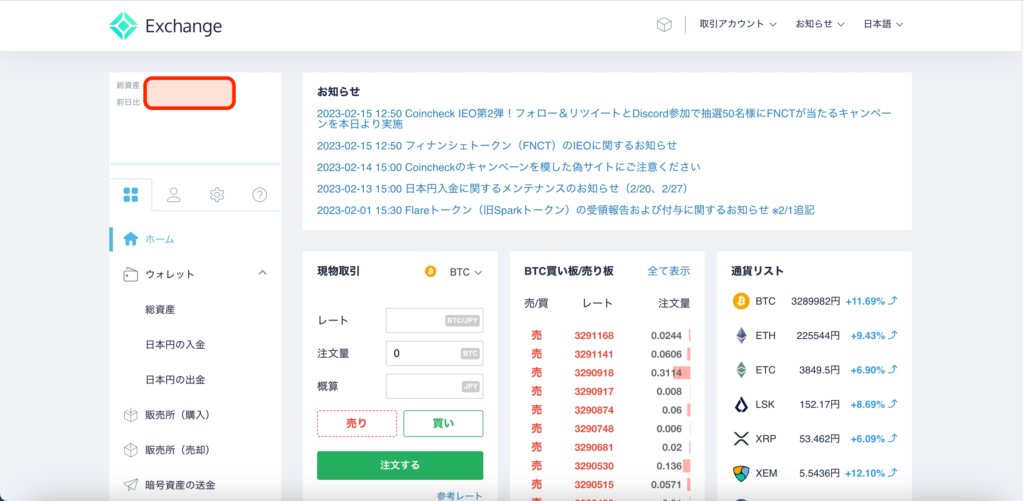
【例】コインチェックで、2022年の取引履歴をダウンロード&アップロードする方法
まず、コインチェックにログインしましょう。
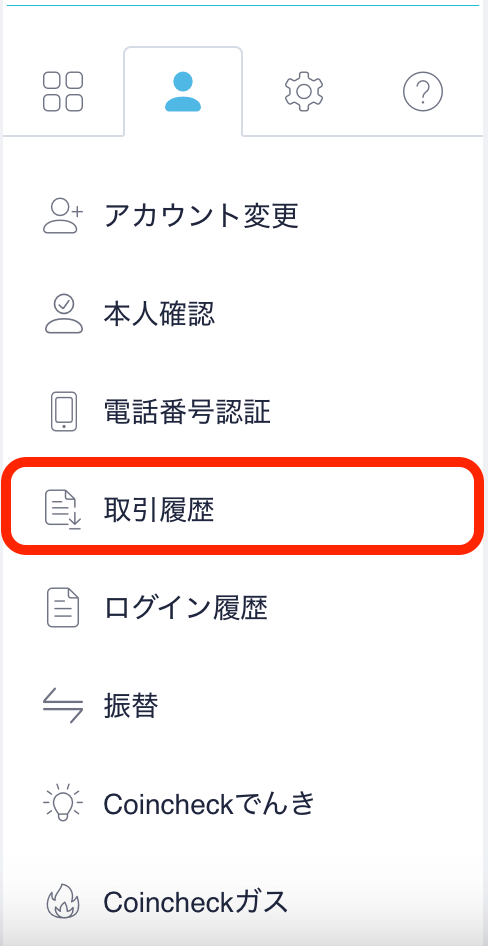
プロフィールタブに切り替え。
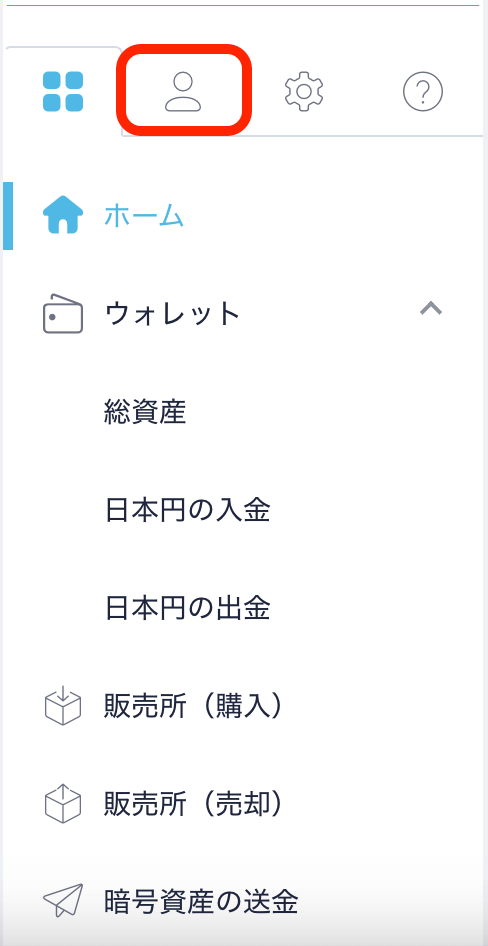
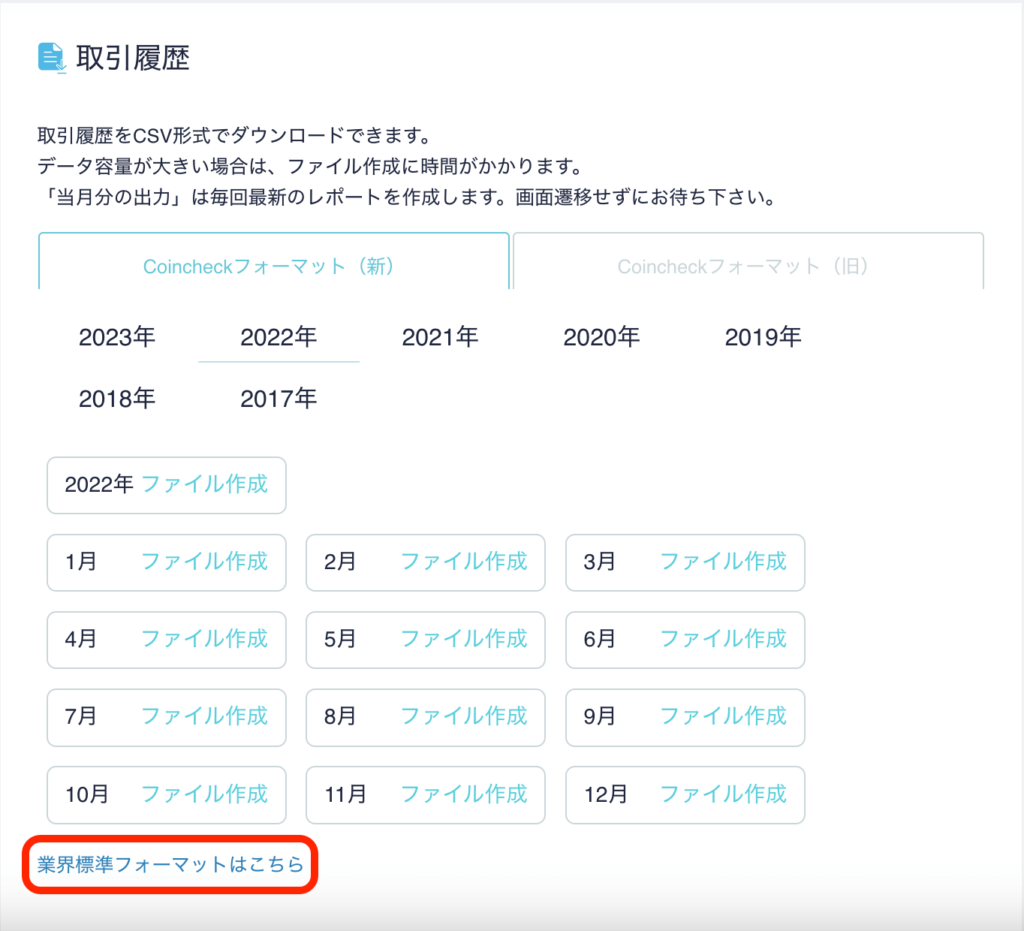
「取引履歴」をクリック👇
「2022年 ファイル作成」をクリック👇
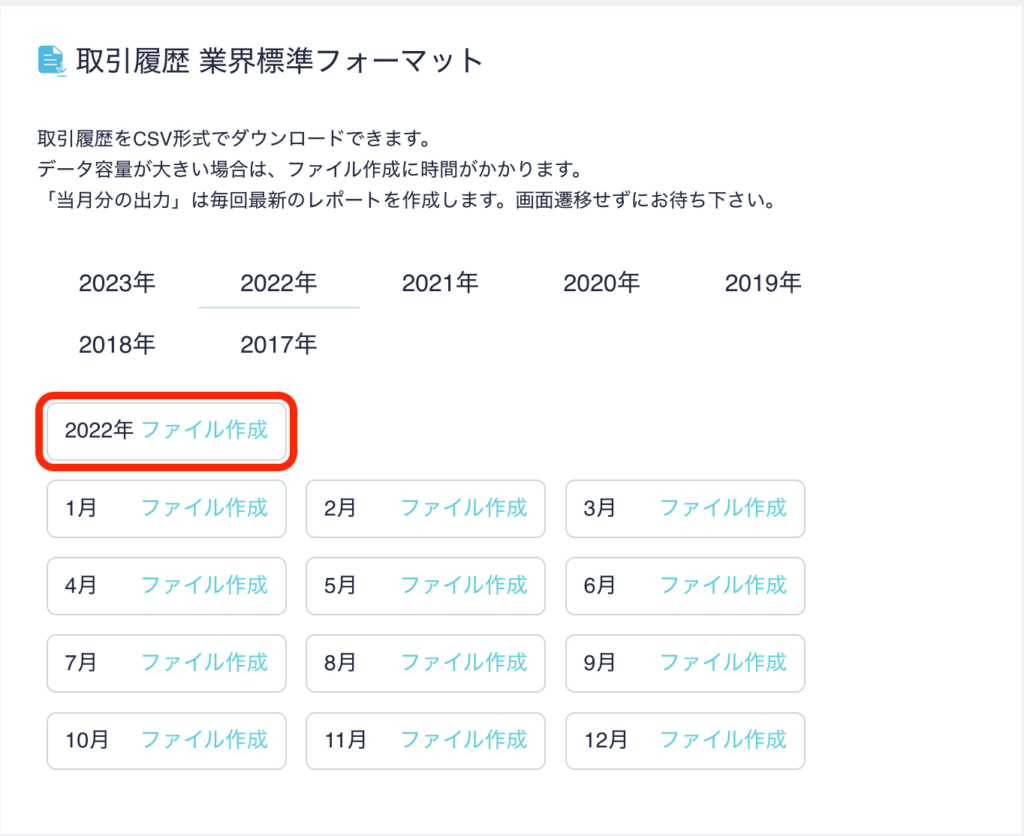
次のメッセージが表示されます。

完了後、文言が「2022年 ファイル作成」から「2022年 ダウンロード」に変わったことを確認します。
(取引のない月は「取引履歴なし」と表示)
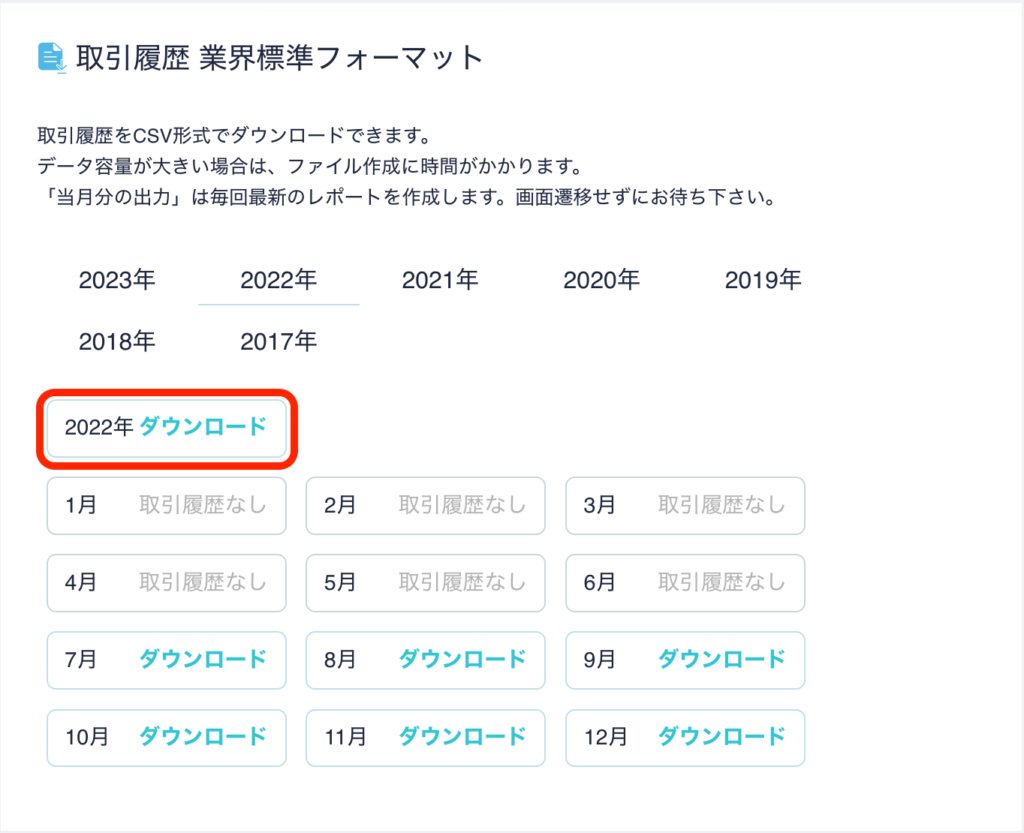
「業界標準フォーマットはこちら」をクリック👇
(画像は上記のファイル作成前になっています…🙏)
ダウンロードの横に「✔︎」が表示されます。
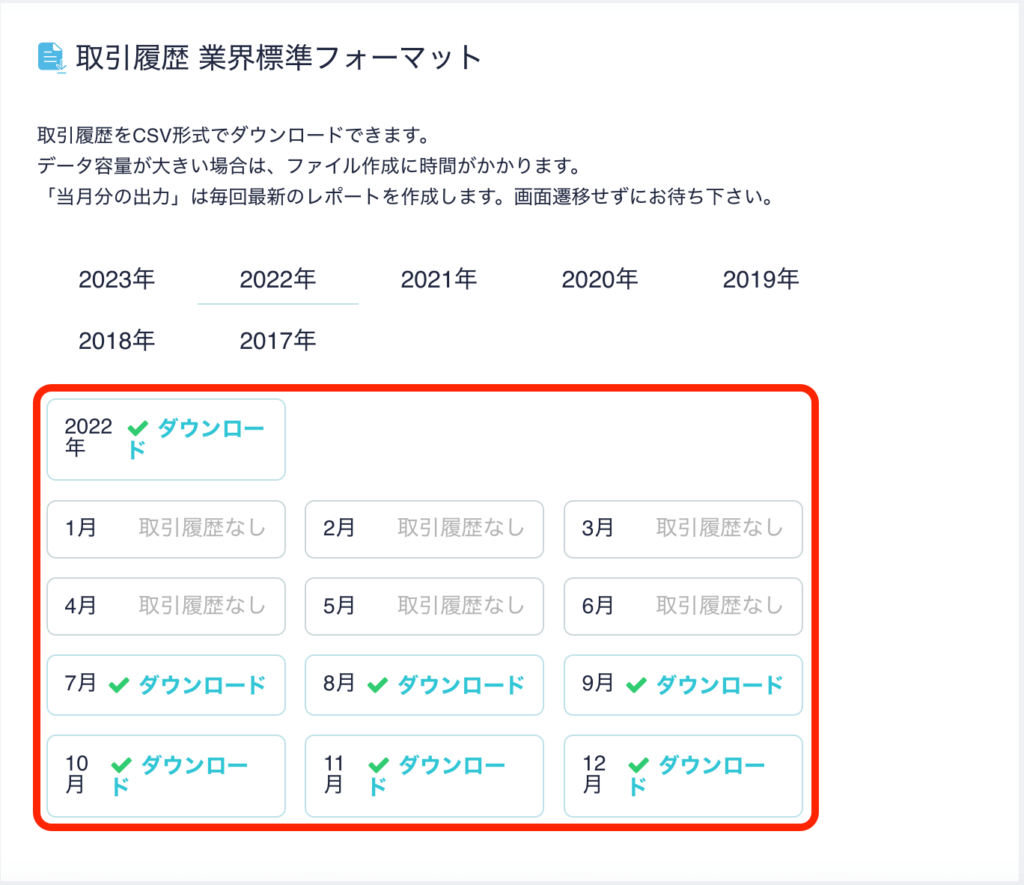
これでダウンロードできるようになりました。
月ごとのファイルをダウンロードしておきましょう!
(次のステップで使います)
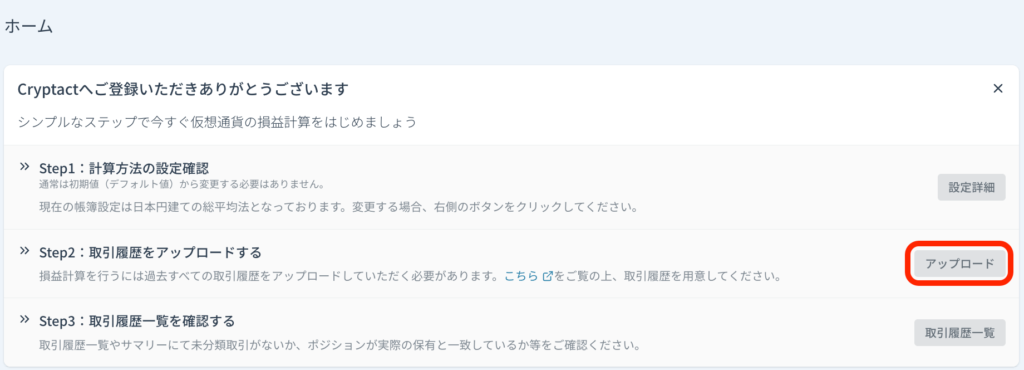
クリプタクトのホーム画面から「アップロード」をクリック👇
ダウンロードしておいたファイルを「古い順に」アップロードしていきます。
僕の場合は「2022年7〜12月」までだよ!
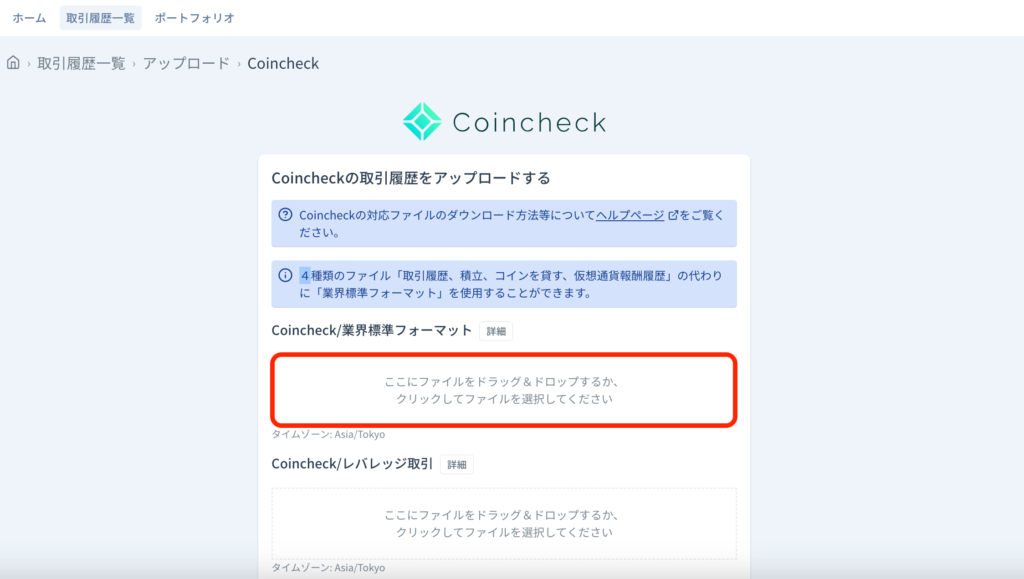
ファイル選択すると、こんな感じになります。
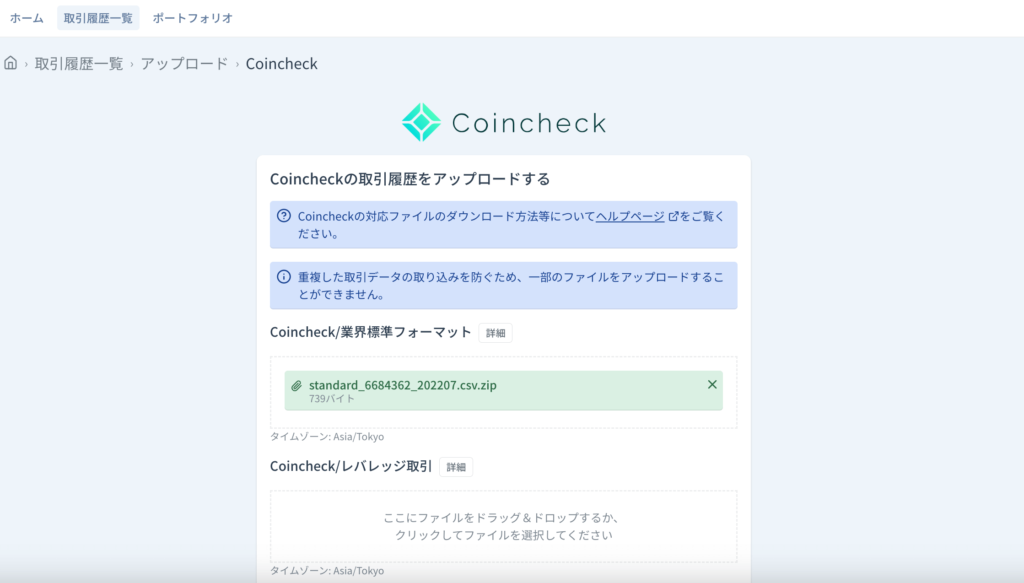
「アップロード」をクリック👇
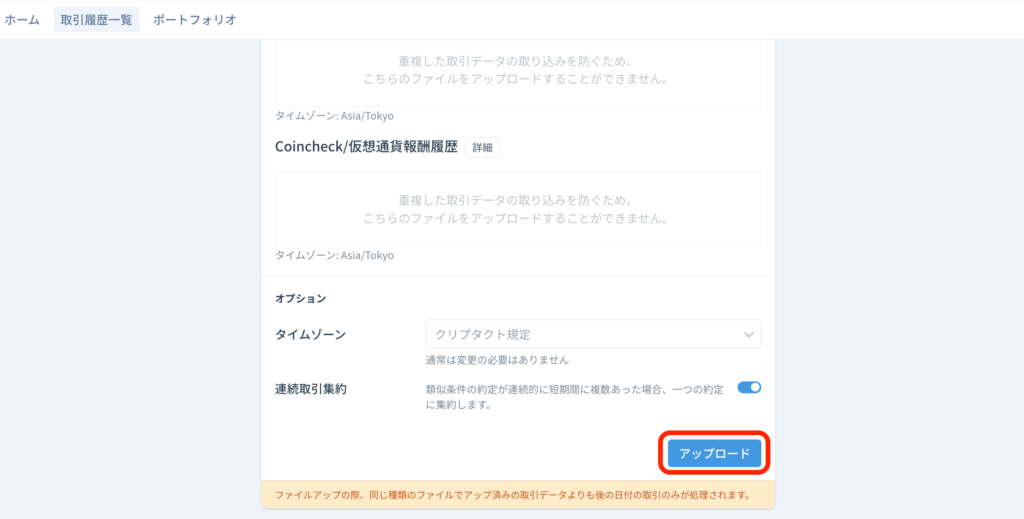
「アップロード完了」が表示されます。
取引した月の分だけ、繰り返しアップロードしてね!
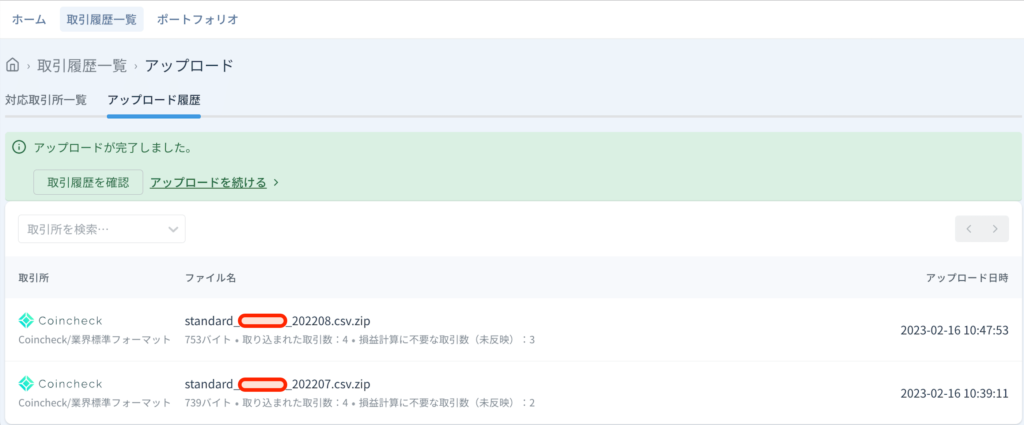
これでアップロードは完了です。
コインチェック以外で、取引履歴をダウンロード&アップロードする方法
おもちさんのブログで詳しく解説しているよ!

ステップ4:NFTの取引履歴をアップロード
ステップ3に続いて、NFTの取引履歴(カスタムファイル)をアップロードするよ!
完成すると、こんな感じになります。
「アップロード」をクリック👇
なお、NFTの取引履歴はExcelでの管理がおすすめです。
「Googleスプレッドシート ▶︎ Excel」に変換してダウンロードもできるよ!
NFTの取引履歴(カスタムファイル)をクリプタクトにアップロードするためには、いくつかの対応が必要です。
対応内容については、以下を参考にしてください。
【最重要】カスタムファイルの編集方法
Engr(エン)さんが開発/紹介しているツールがおすすめです。
ウォレット接続しなくても、取引履歴がすぐに取得できるよ!
>>元ツイートはこちら
自分が取引に使った通貨の「Go」をクリック👇
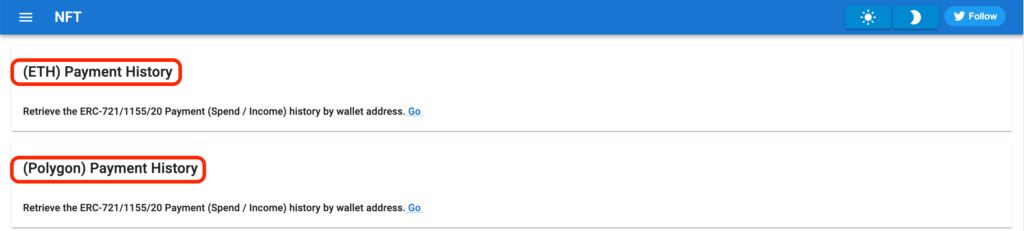
ここでは「ETH」での編集方法を紹介しますね!
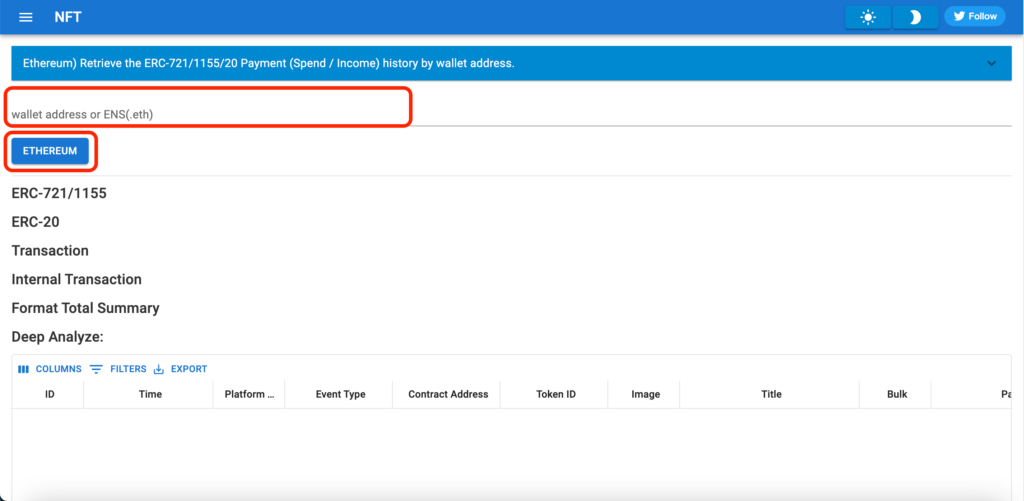
ウォレットアドレスを入力し、「ETHEREUM」をクリック👇
「FINISHED」になっていることを確認し、「Export」をクリック👇
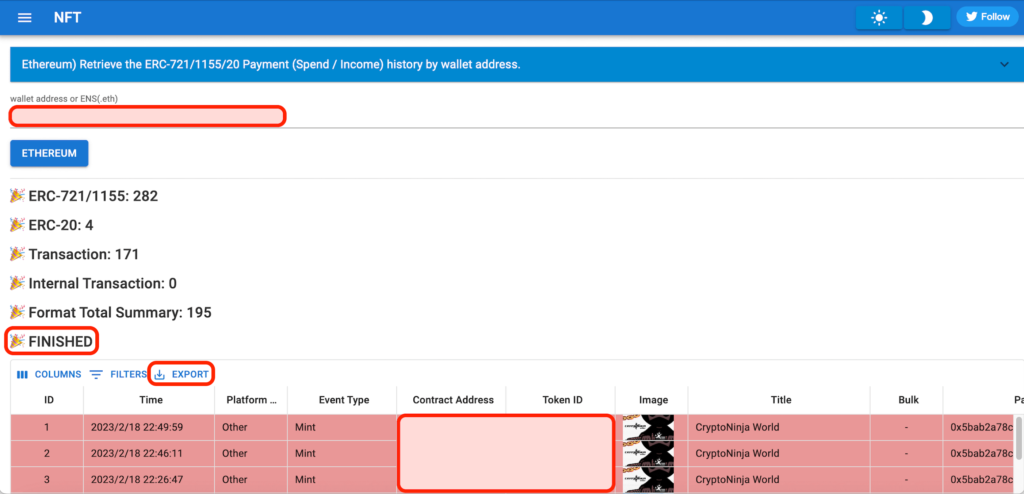
NFTの取引履歴がダウンロードできました。
ウォレットを複数に分けている場合は、それぞれ同じ手順でダウンロードしてね!(この画面は後ほど使うので閉じないでね)
ここが1番大変…
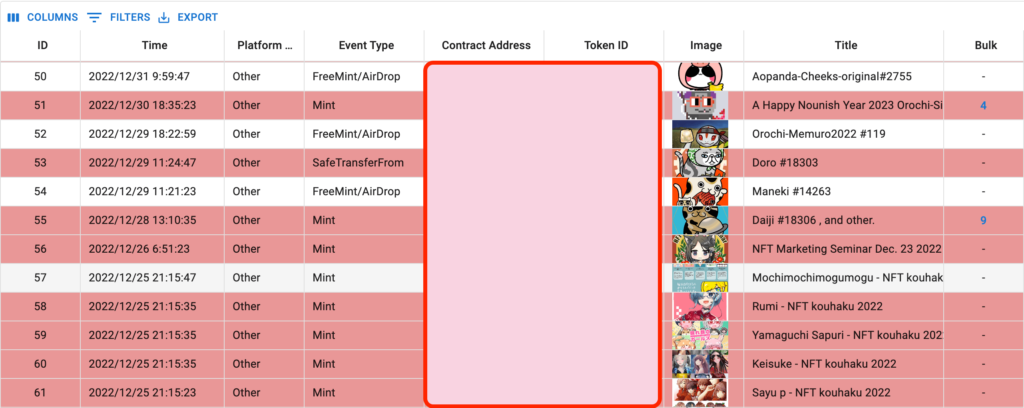
【取引履歴】(A〜U列)

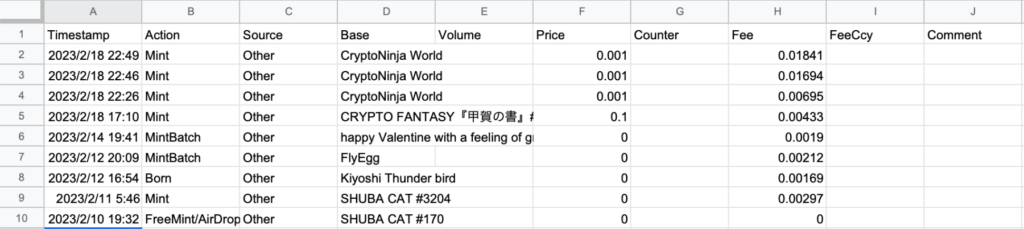
【専用フォーマット】(A〜J列)
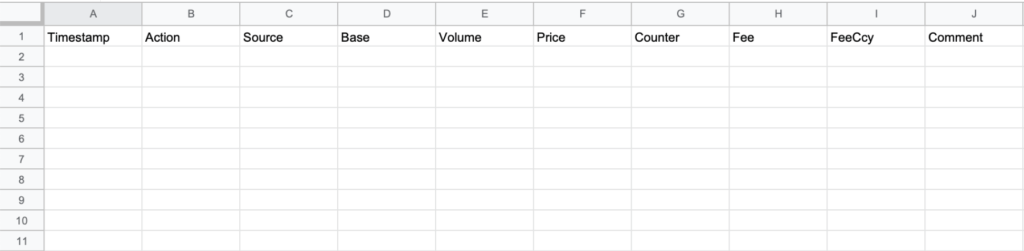
【取引履歴】内の必要な情報を【専用フォーマット】に転記します。
具体的な貼り付け方法は、以下のとおりです。
(左側は【取引履歴】、右側は【専用フォーマット】)
左から順に【取引履歴】、【専用フォーマット】、意味を書いたよ!
B列「Time」 ▶︎ A列「Timestamp」 :いつ?
D列「Event Type」 ▶︎ B列「Action」 :何をした?
C列「Platform Type」 ▶︎ C列「Source」 :どこで?
H列「Title」 ▶︎ D列「Base」 :何を?
M列「Value(ETH)」 ▶︎ F列「Price」 :いくらで?(NFT)
N列「TX Fee(ETH)」 ▶︎ H列「Fee」 :いくらで?(ガス代)
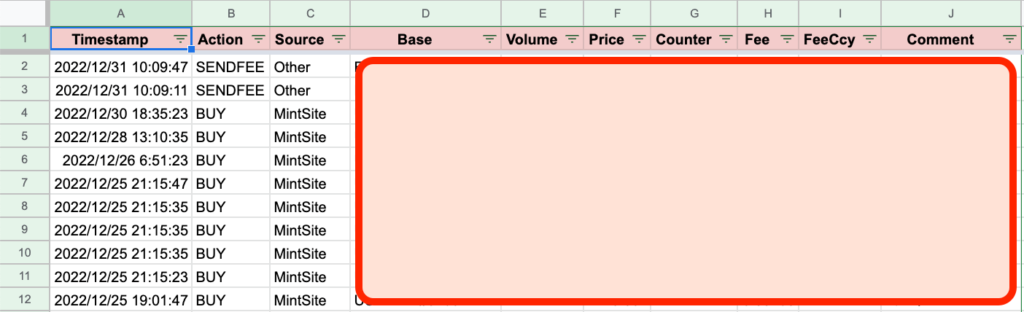
貼り付けると、こんな感じになります。
STEP1で取得した取引履歴のImage列に画像がついているので、こちらを頼りにどんな取引をしたのか思い出しましょう。
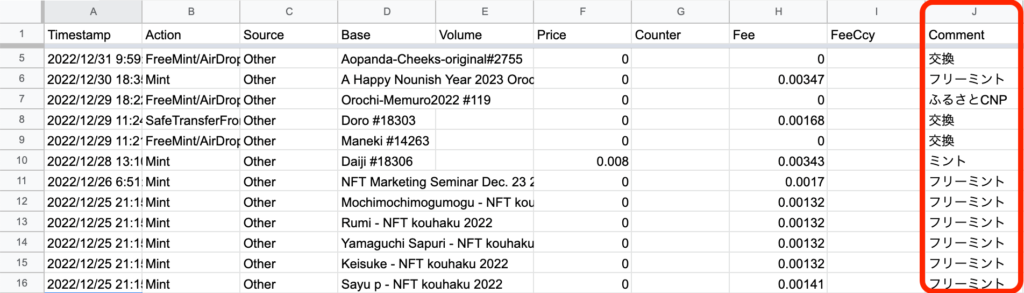
【専用フォーマット】のJ列(Comment)に記載しておくのが良き!
僕の場合は、こんな感じで書きました。
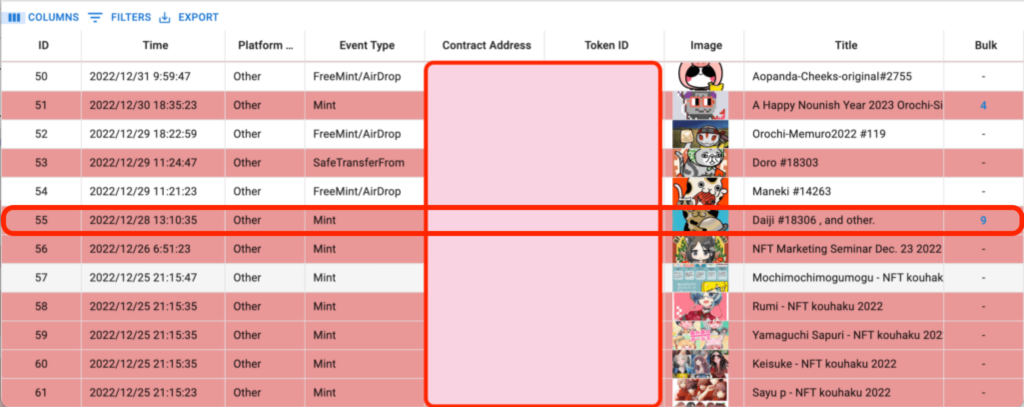
実際に買った場合の記載(ID:55)を紹介します。
専用フォーマットへの記載(10行目)は、こんな感じになります。

STEP3からの修正箇所は以下のとおり。
B列「Mint」 ▶︎ 「BUY」 :何をした?
C列「Other」 ▶︎ 「Mintsite」 :どこで?
D列「Daiji #18306」 ▶︎ 「USER-LLAC#18306」 :何を?
E列「Volume」 ▶︎ 「9」 :いくつ?
G列「空白」 ▶︎ 「ETH」 :通貨?(NFT)
I列「空白」 ▶︎ 「ETH」 :通貨?(ガス代)
気をつける点は2点あります。
・C列は具体的な場所を指定(例:Mintsite、OpenaSeaなど)
・D列は先頭に「USER-」を指定
→ 半角英数字(大文字のみ)&シャープ(#)で合計15文字以内
→ 小文字はNG
プロジェクトの略称は3〜4文字くらいで統一した方が良き!
例:USER-LLAC#○○○○、USER-CNP#○○○○ など
準備中
実際にガス代飲みかかった場合の記載(ID:86)を紹介します。
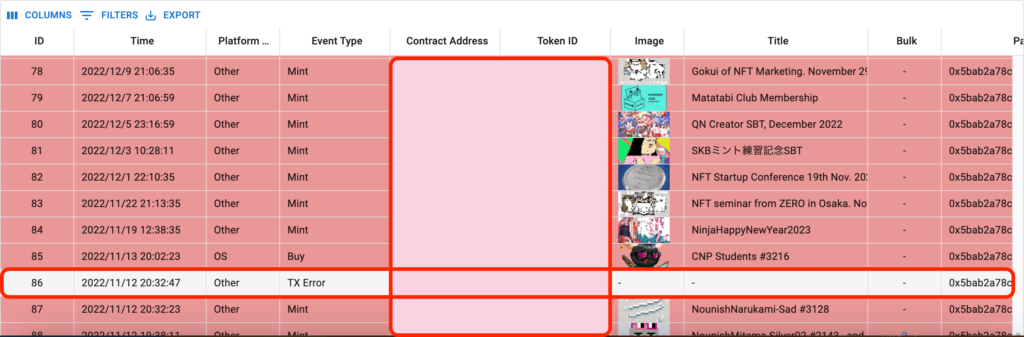
専用フォーマットへの記載(41行目)は、こんな感じになります。

STEP3からの修正箇所は以下のとおり。
B列「Mint」 ▶︎ 「SENDFEE」 :何をした?
C列「Other」 ▶︎ 「Mintsite」 :どこで?
D列「空白」 ▶︎ 「ETH」 :何を?
E列「Volume」 ▶︎ 「0.00071」 :ガス代?
F列「0」 ▶︎ 「空白」 :記載しないルールのため
G列「空白」 ▶︎ 「JPY」 :通貨?(NFT)
H列「空白」 ▶︎ 「0」 :ガス代はE列に記載
I列「空白」 ▶︎ 「JPY」 :通貨?(ガス代)
カスタムファイルが完成したら、クリプタクトにアップロードします。
「取引履歴一覧」に切り替え。
画面右上の「取引履歴追加」をクリック👇
「ファイルをアップロード」をクリック👇
「カスタム」をクリック👇
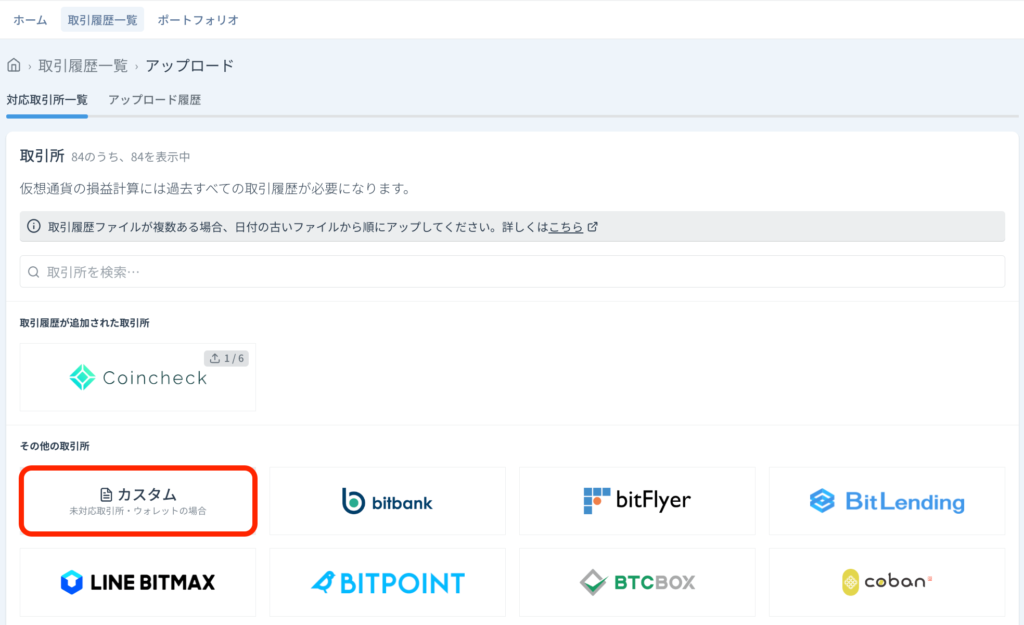
作成したカスタムファイルをこちらに載せましょう。
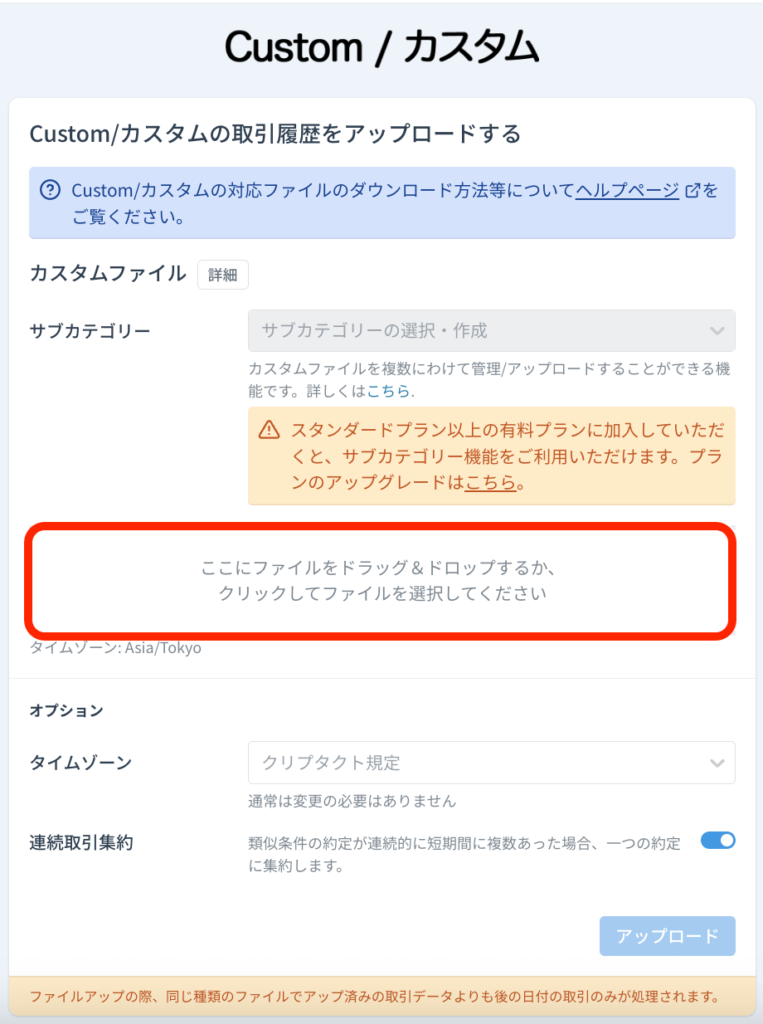
「アップロード」をクリック👇
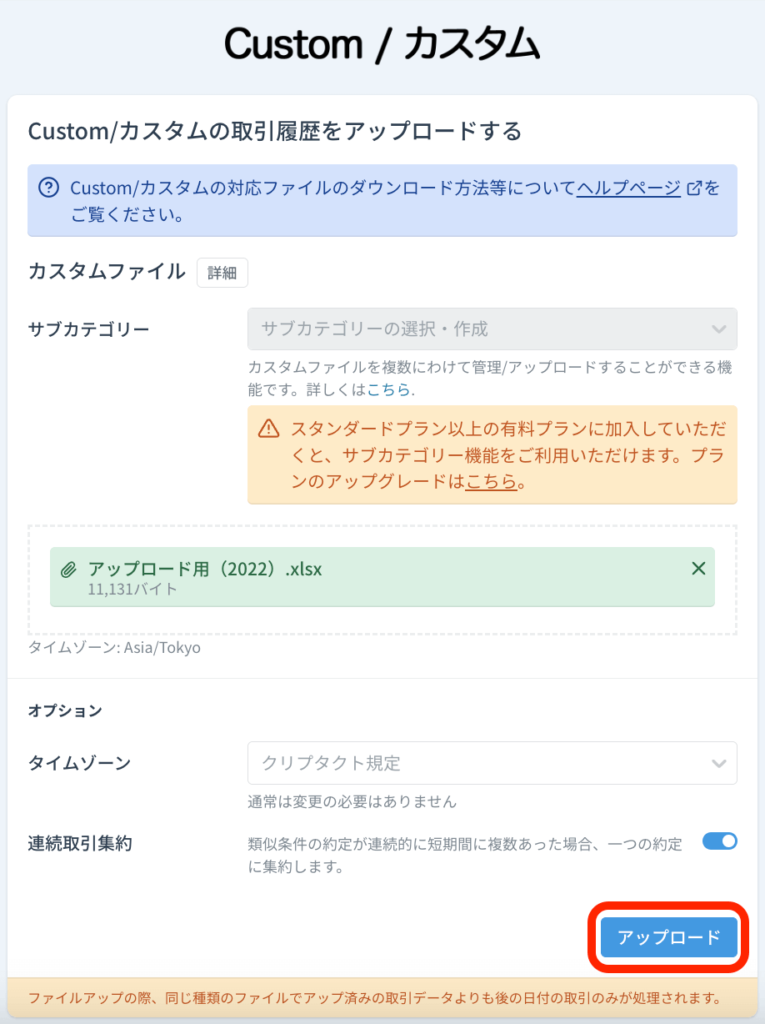
以下のメッセージが表示されたら、アップロード完了です!
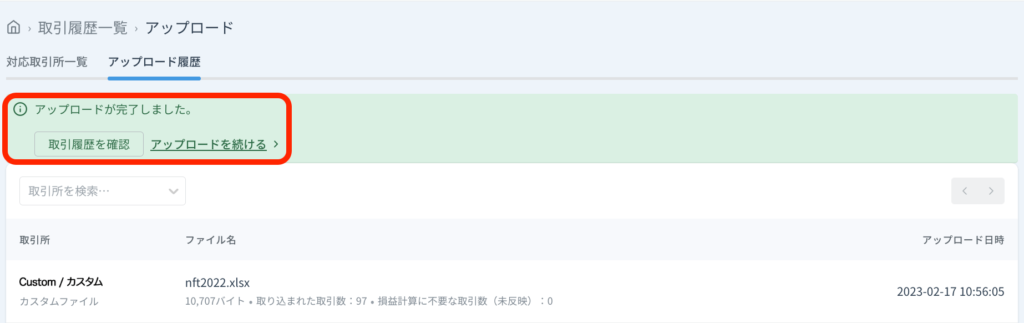
「実現損益」も確認できるようになりますよ。(あれ、マイナs…笑)
これで損益計算はすべて完了です!🙌

お疲れ様でした!
ちなみに、失敗するとこんなメッセージが表示されます。
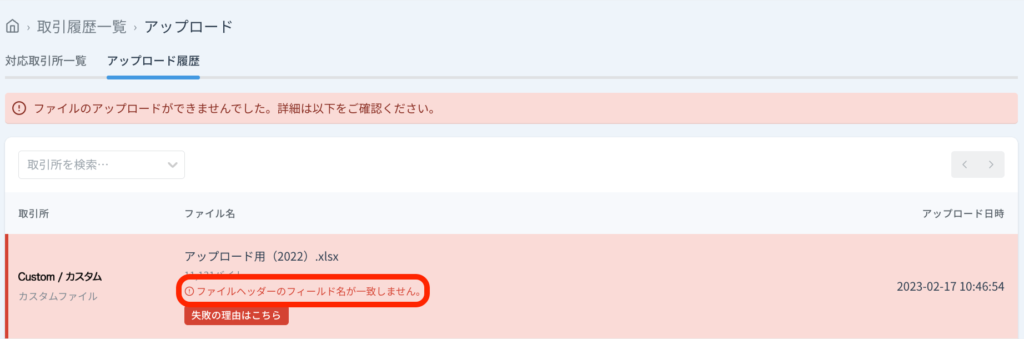
僕は、ヘッダー名が一部間違っていたので、エラーになりました!
まとめ

ここまでお疲れ様でした。
個人的にはカスタムファイルの作成が1番大変でした…。
特に警告などが出ていなければ大丈夫です。
本記事のとおり進めることで、NFTから発生した実現損益が計算できます。
「実現損益」が仮想通貨とNFTから発生した収益になるので、必要に応じて確定申告を進めてくださいね。
\ 損益計算で困らなくて済む /